
Smarter ways to manage shipping and logistics
Our features make managing your orders, shipping, and deliveries easy. They help you save time and money while keeping everything in one platform for a seamless experience.
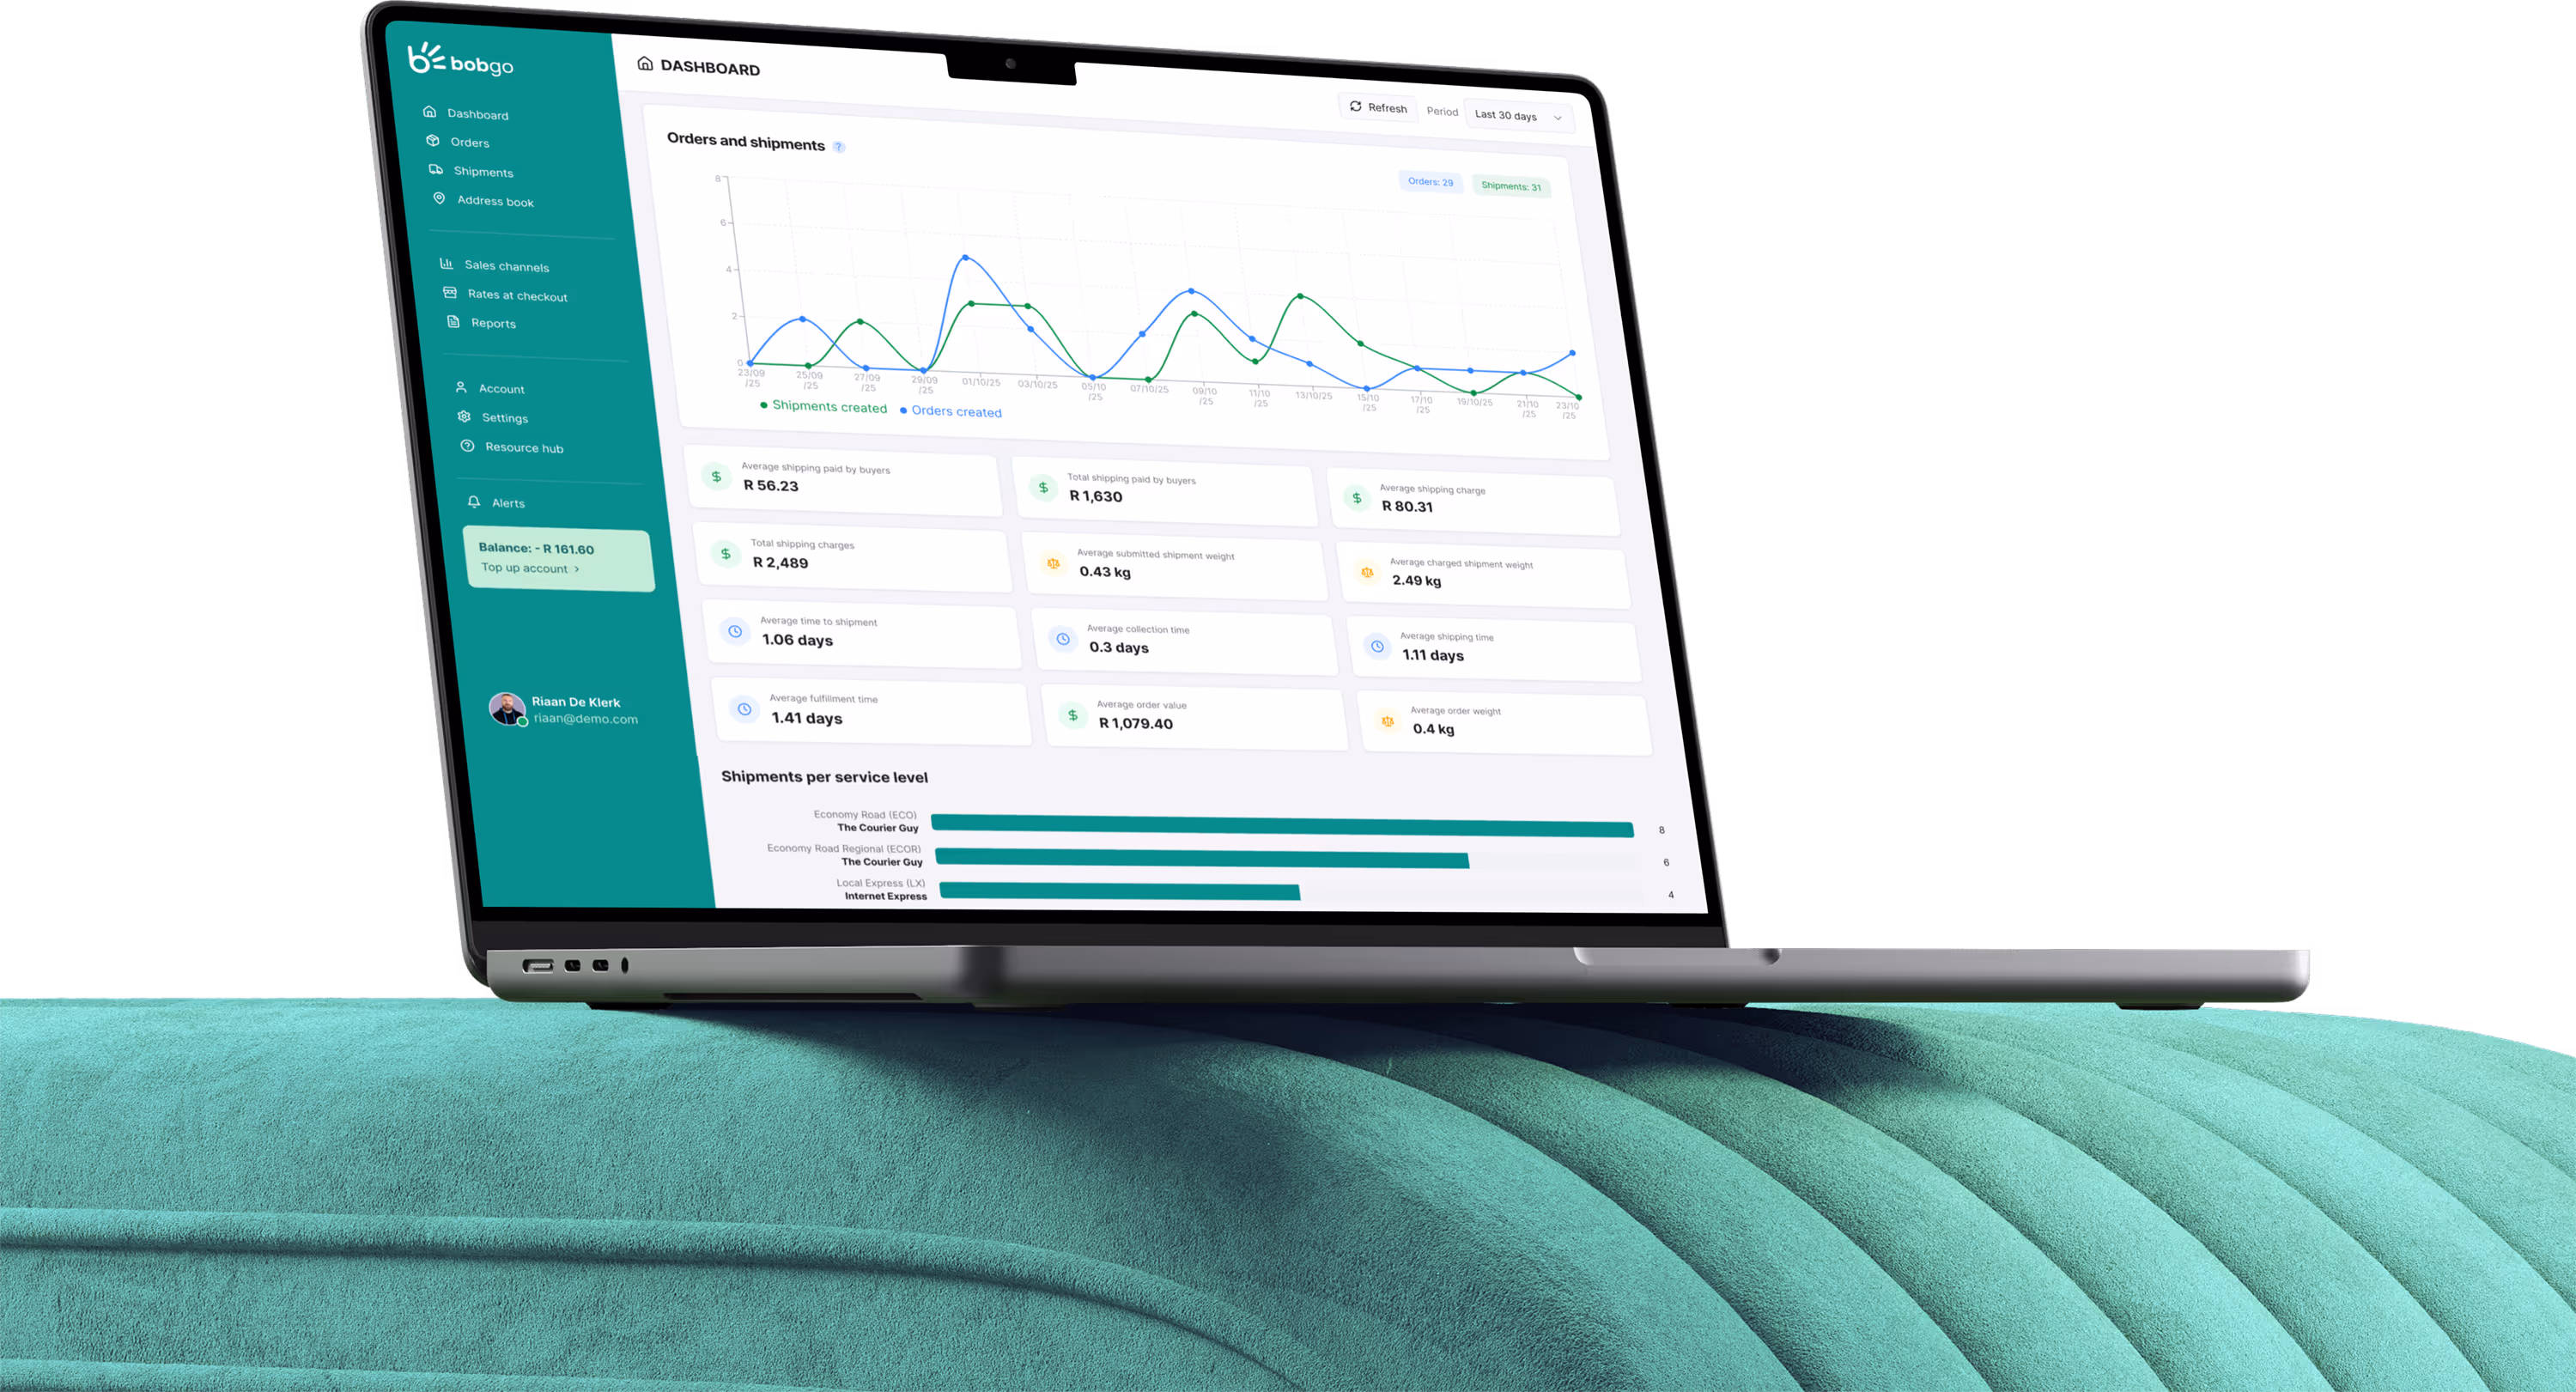
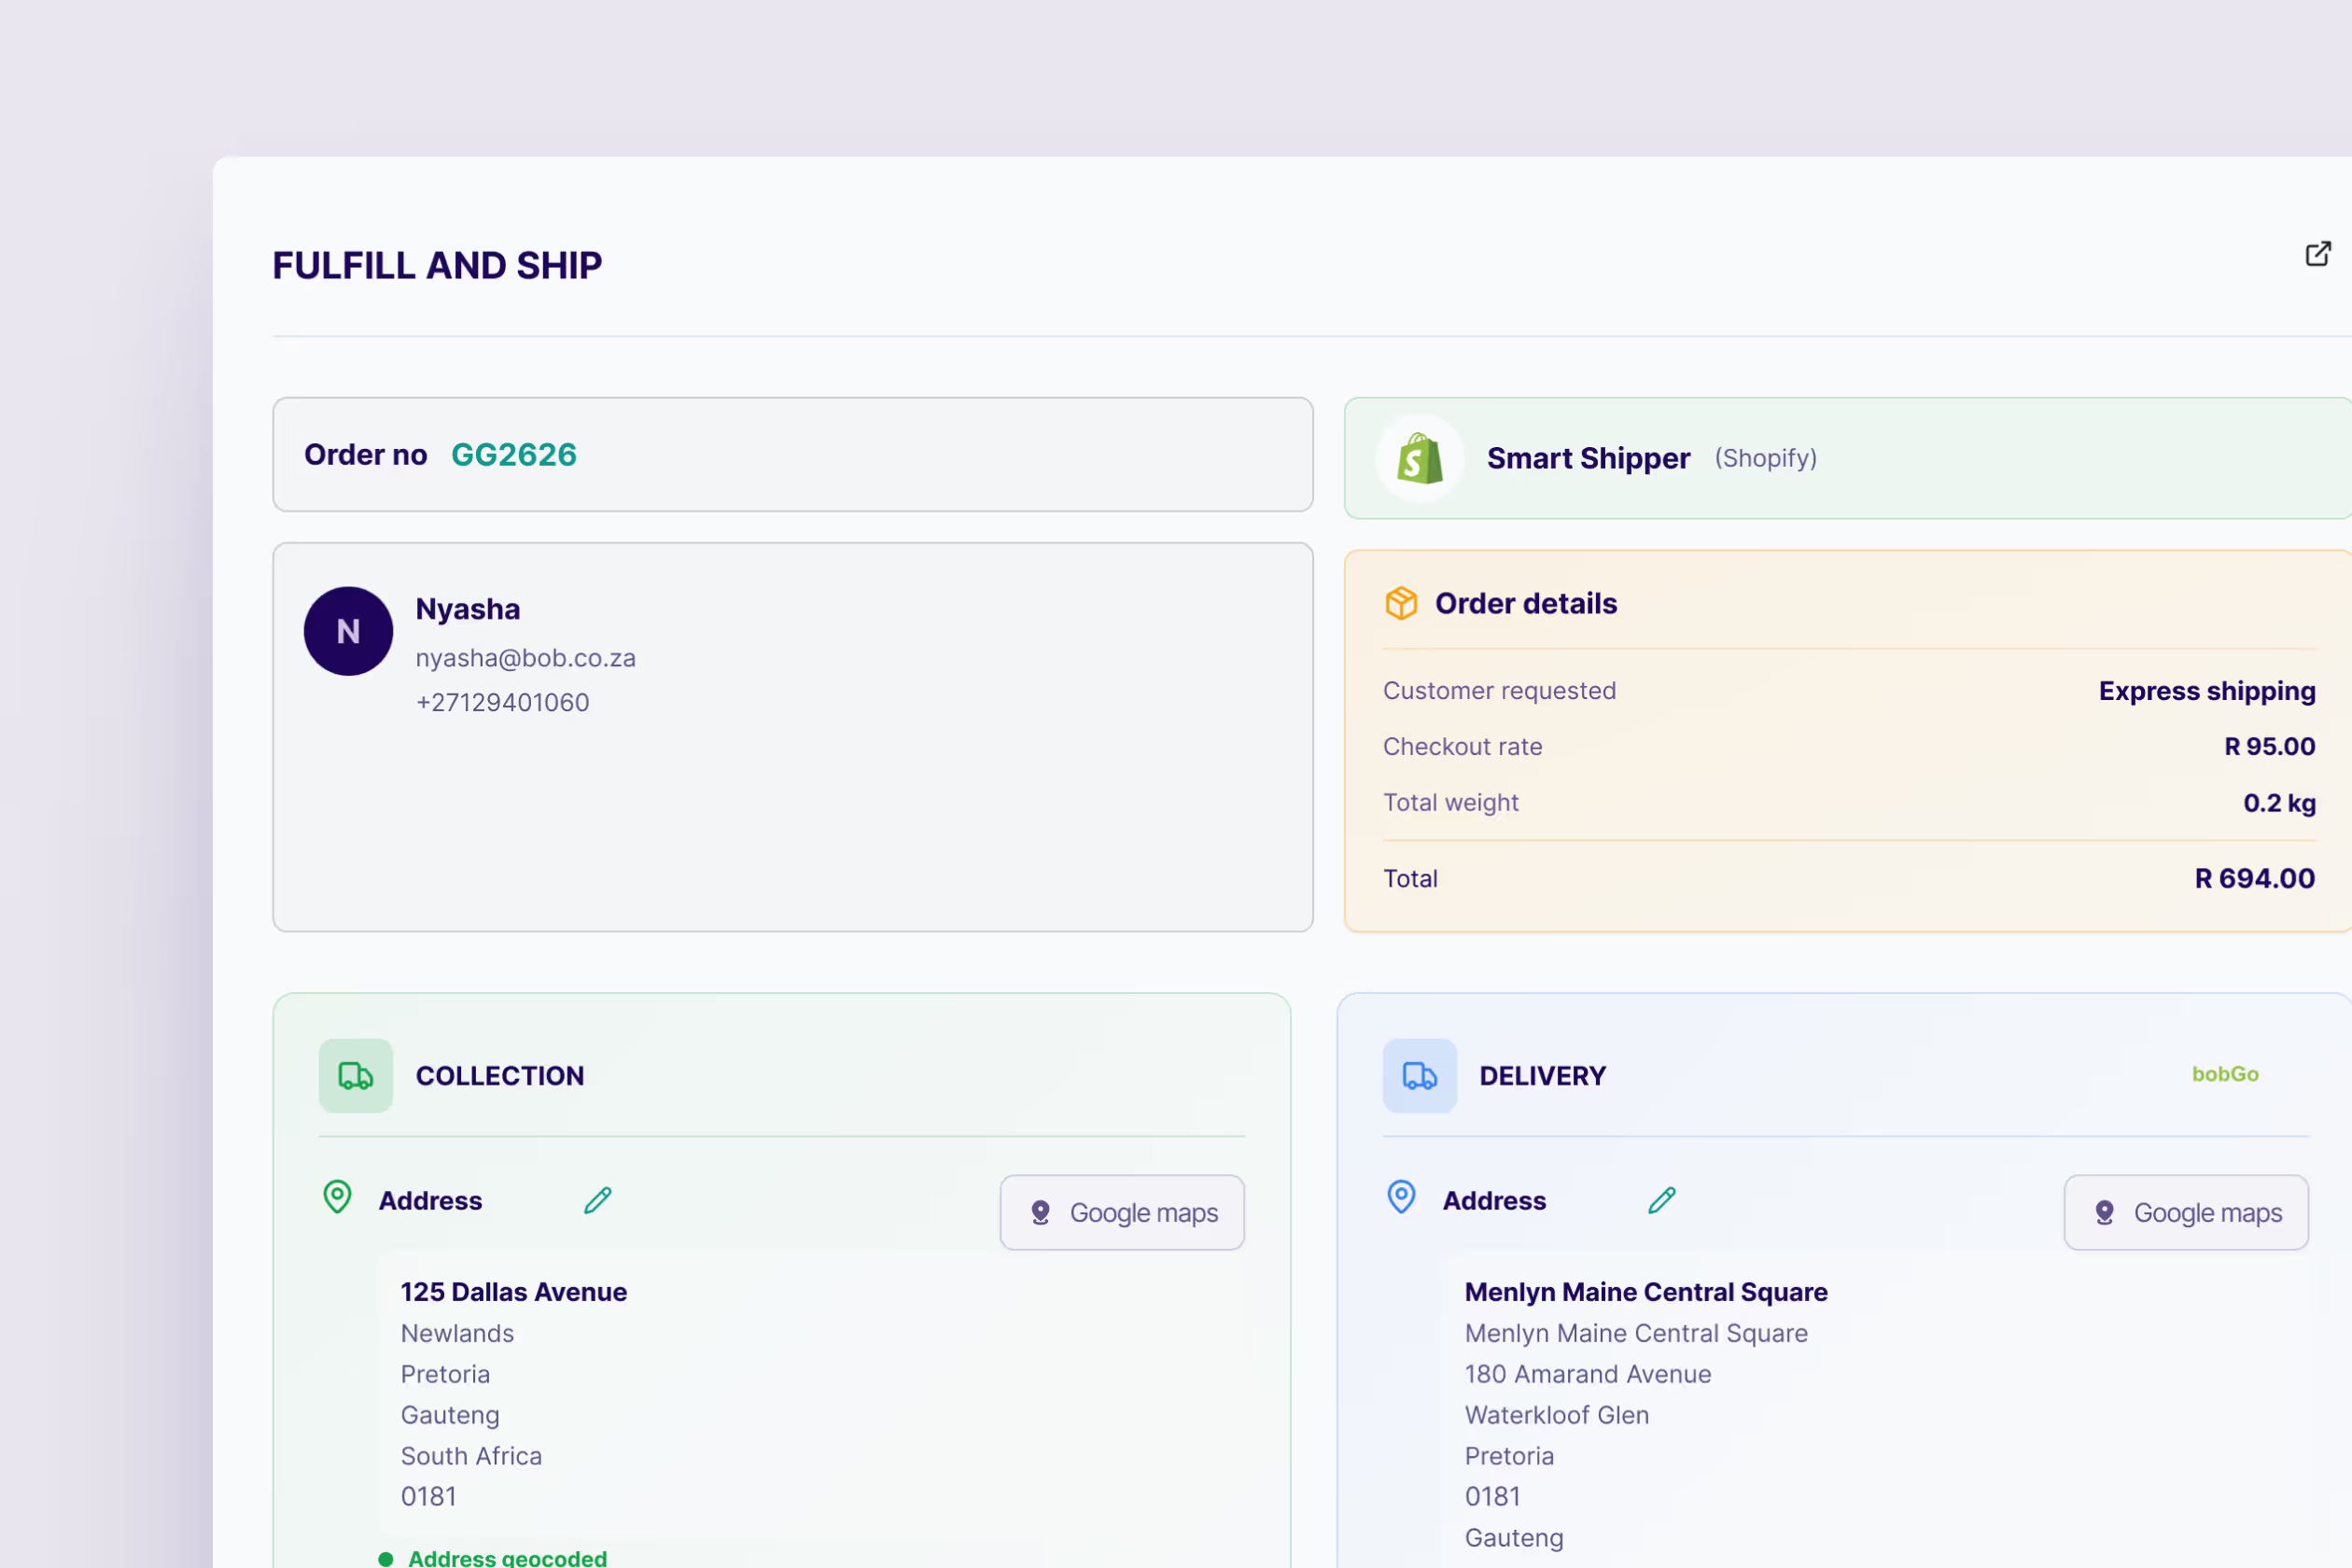
Powerful shipping features at your fingertips
Manage all your shipments with an intuitive dashboard that makes it easy to track orders, monitor couriers, and stay in control of every delivery from one place.

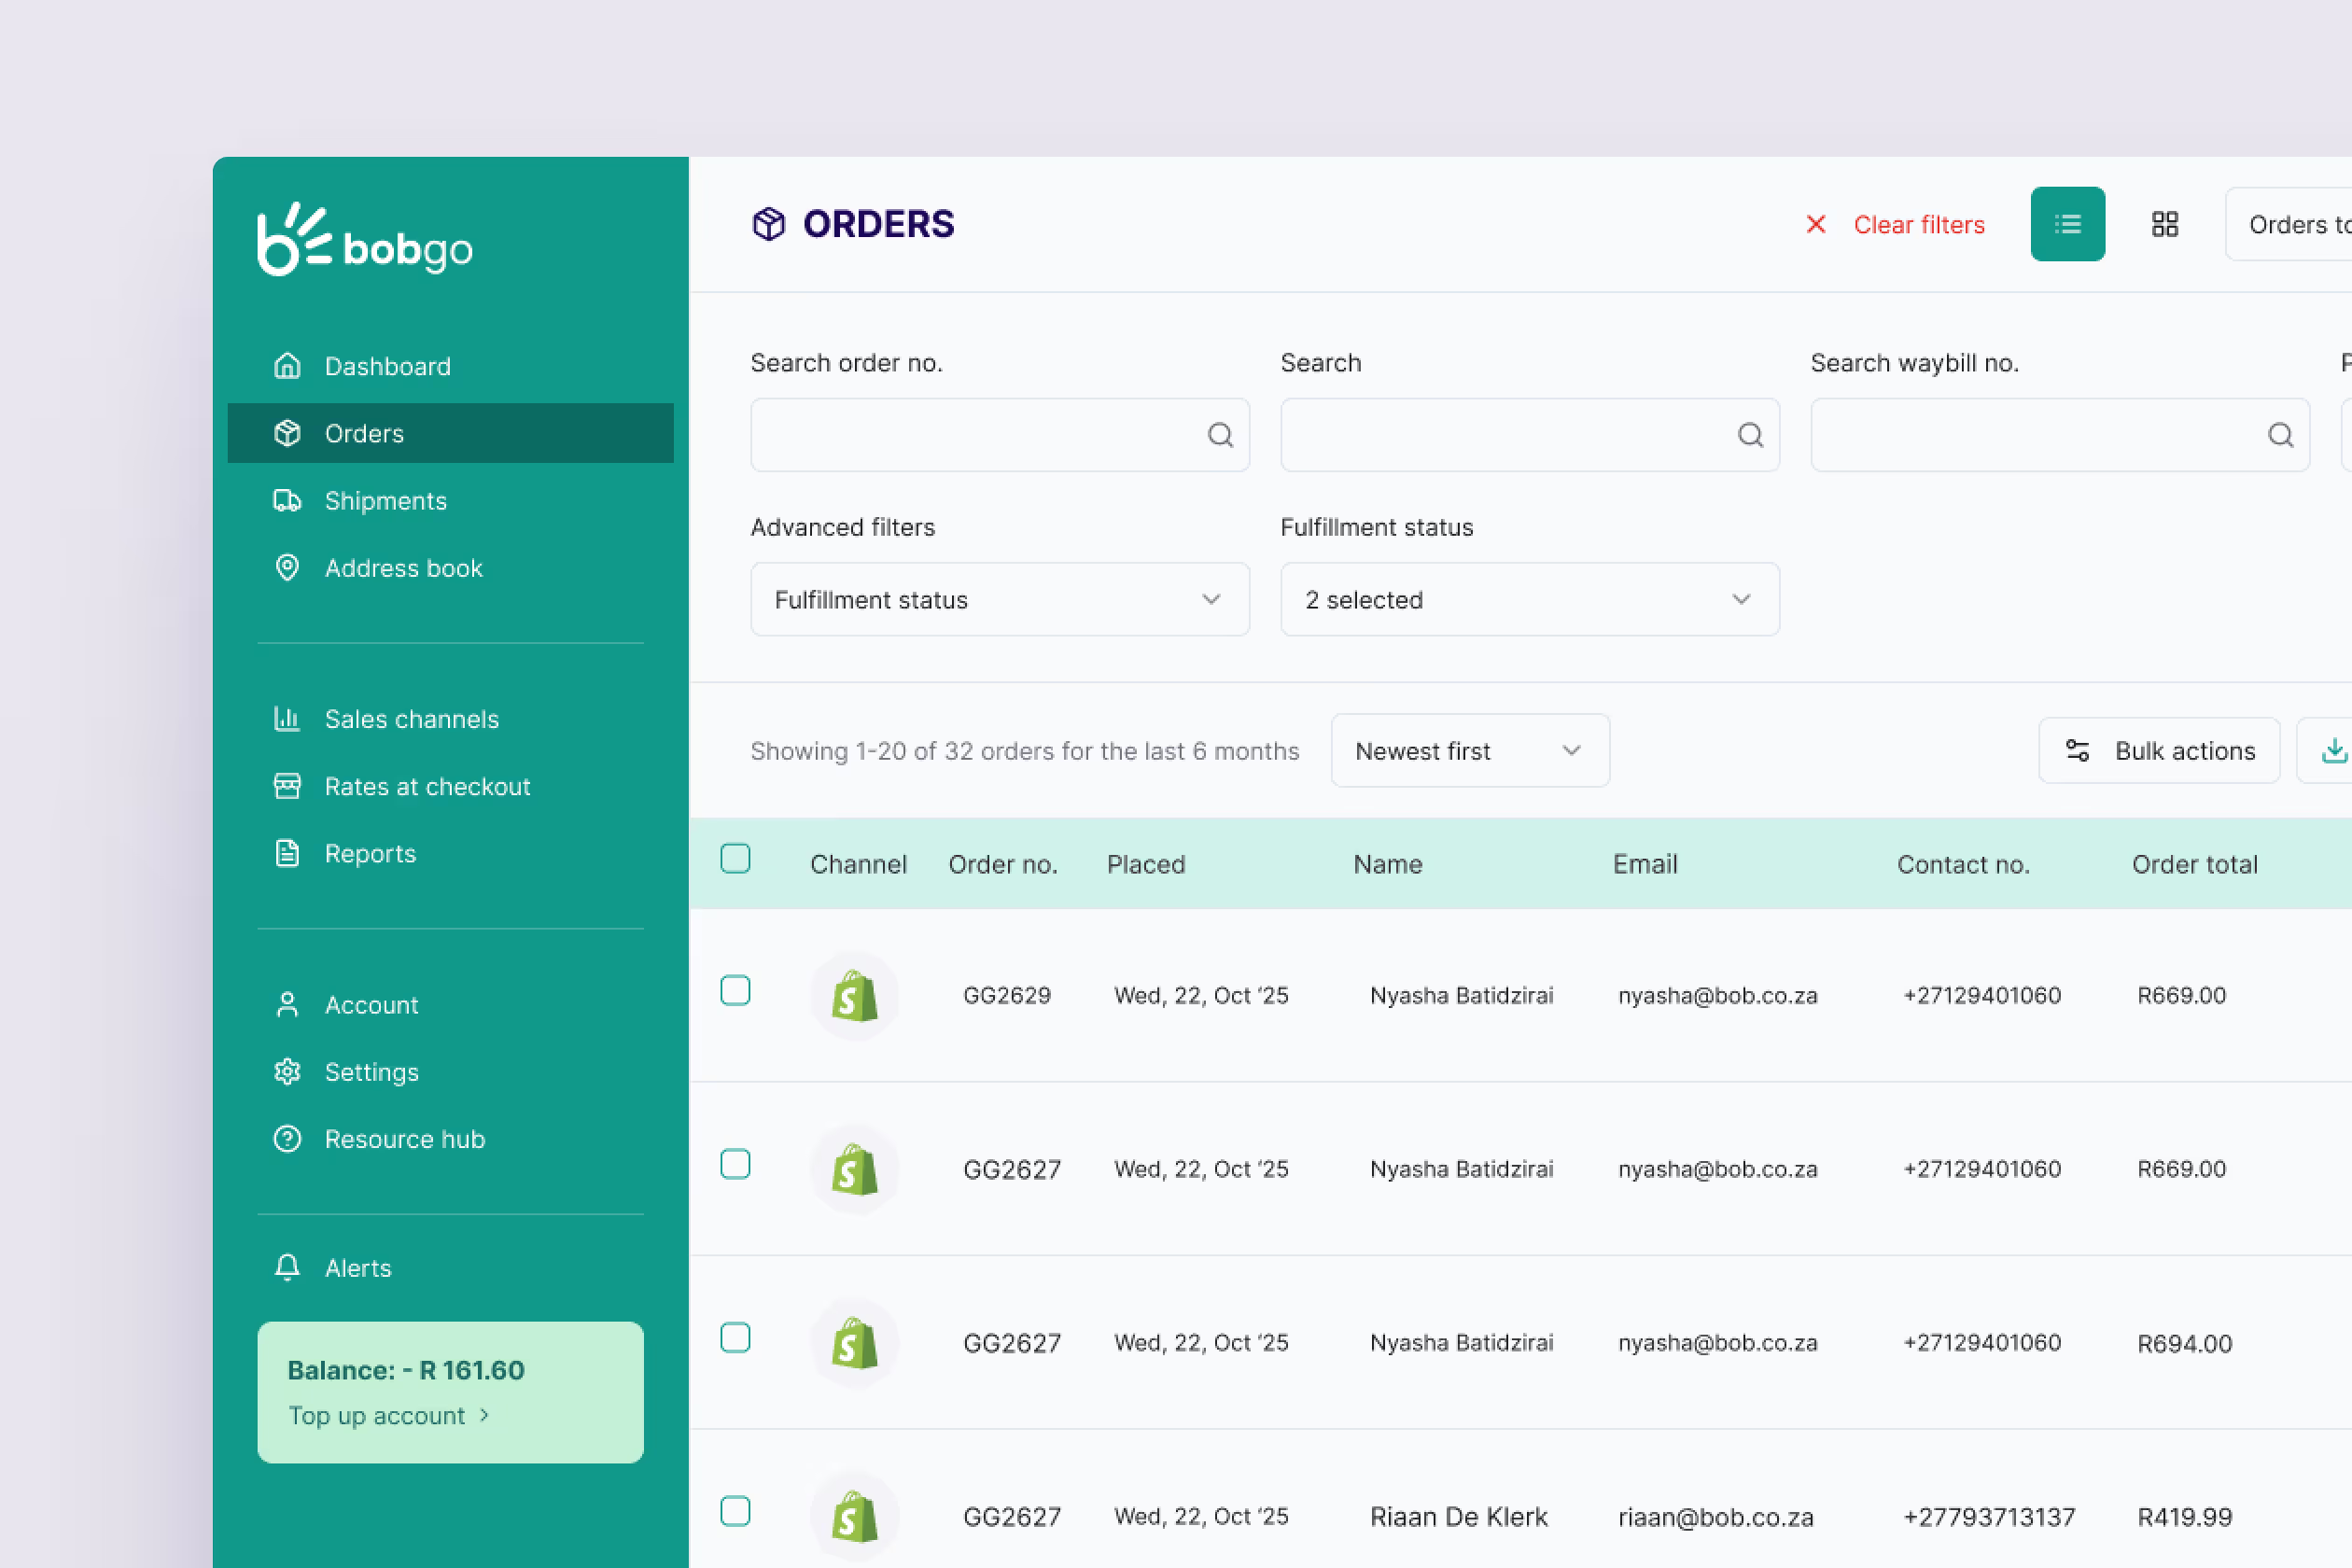
Real-time order syncing
Keep all your orders up to date across platforms automatically, so you never miss a beat.
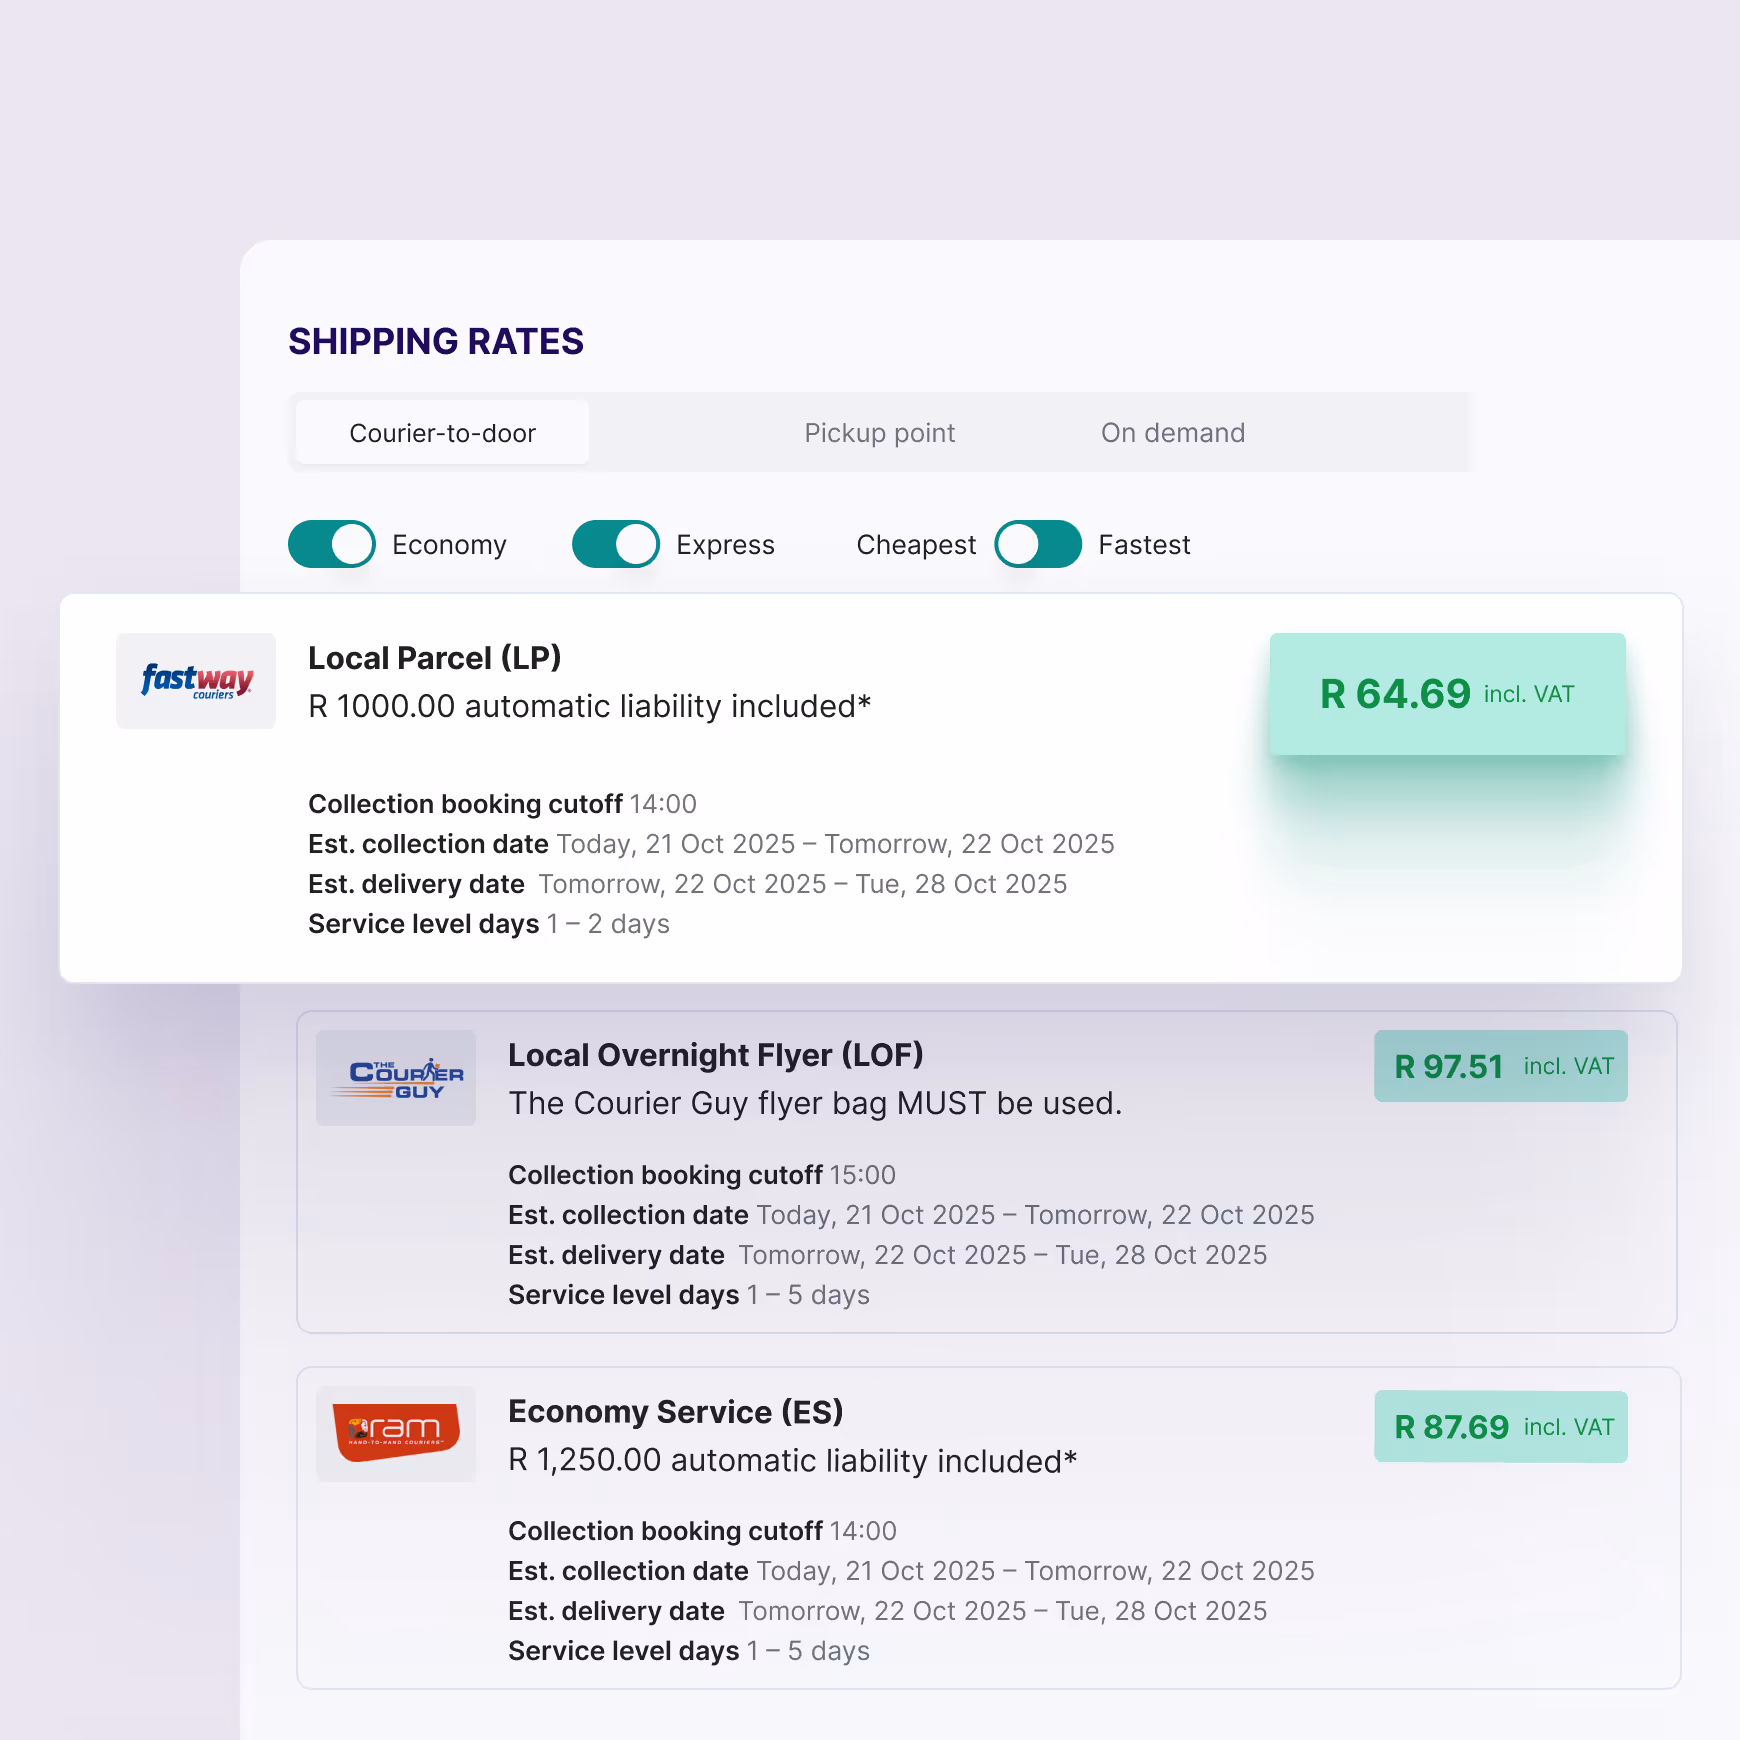
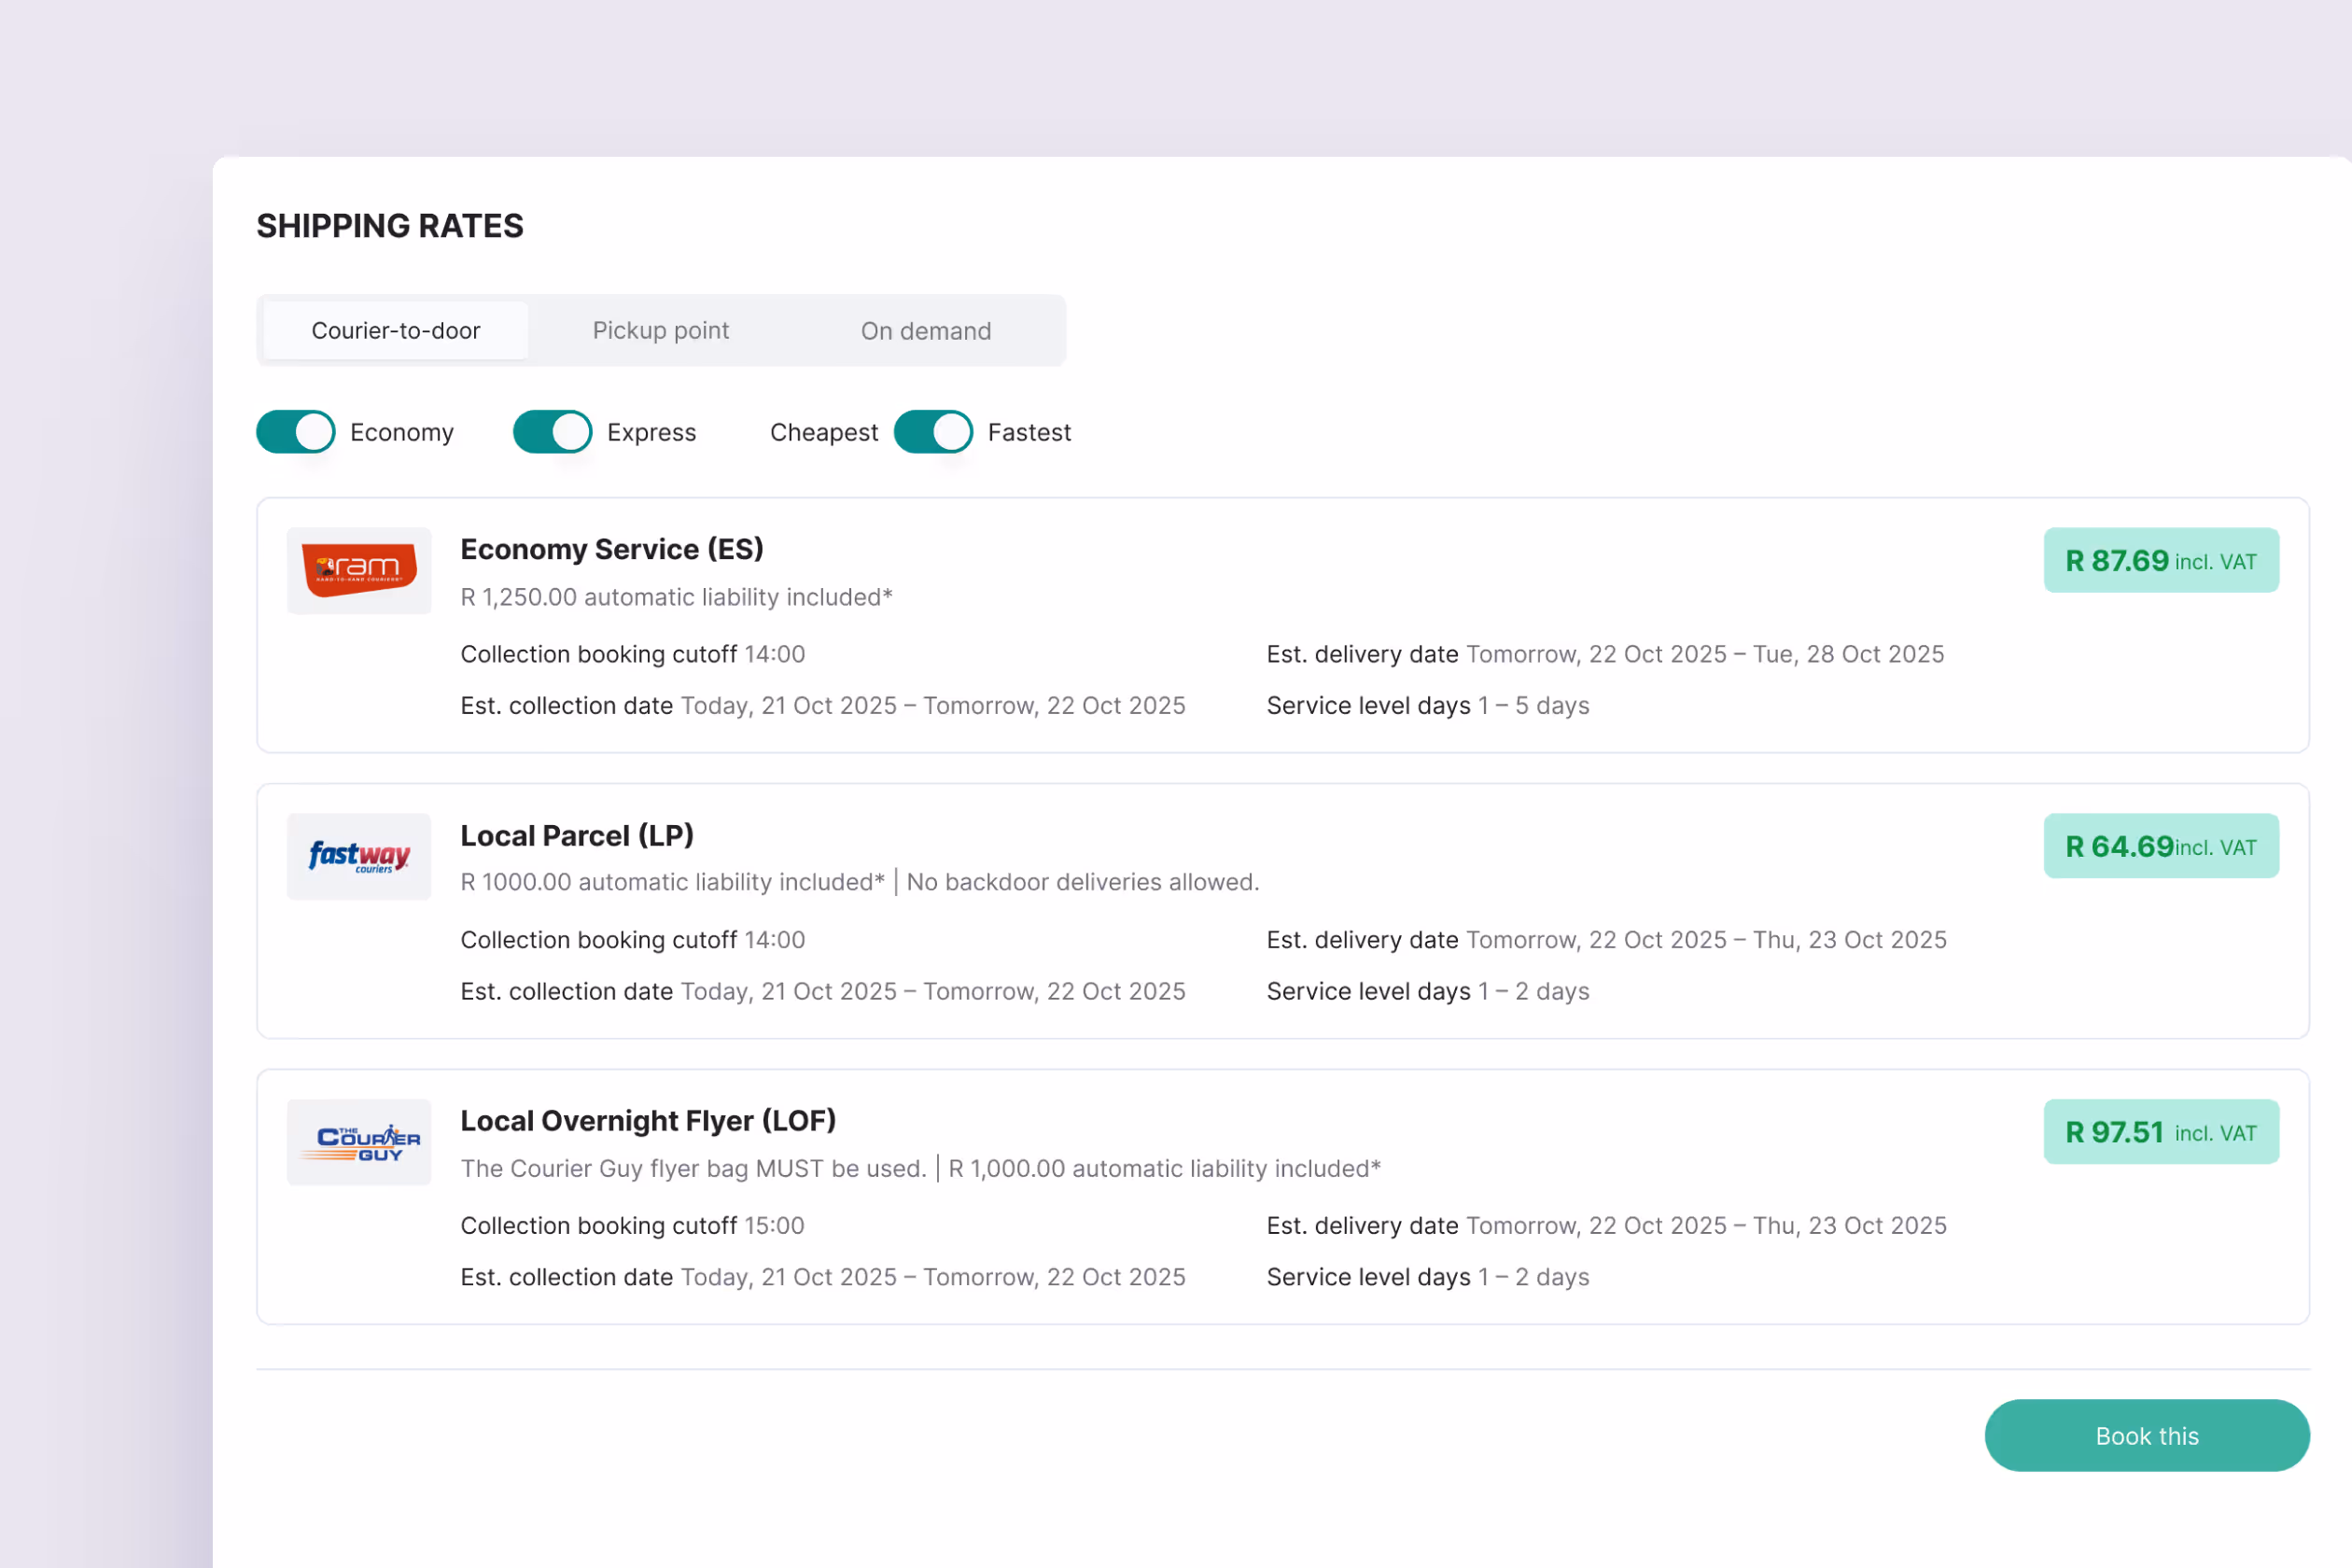
Competitive courier rates
Choose from multiple couriers to get the best shipping price for every order.
Tracking notifications
Keep customers informed every step of the way with automated shipment updates.
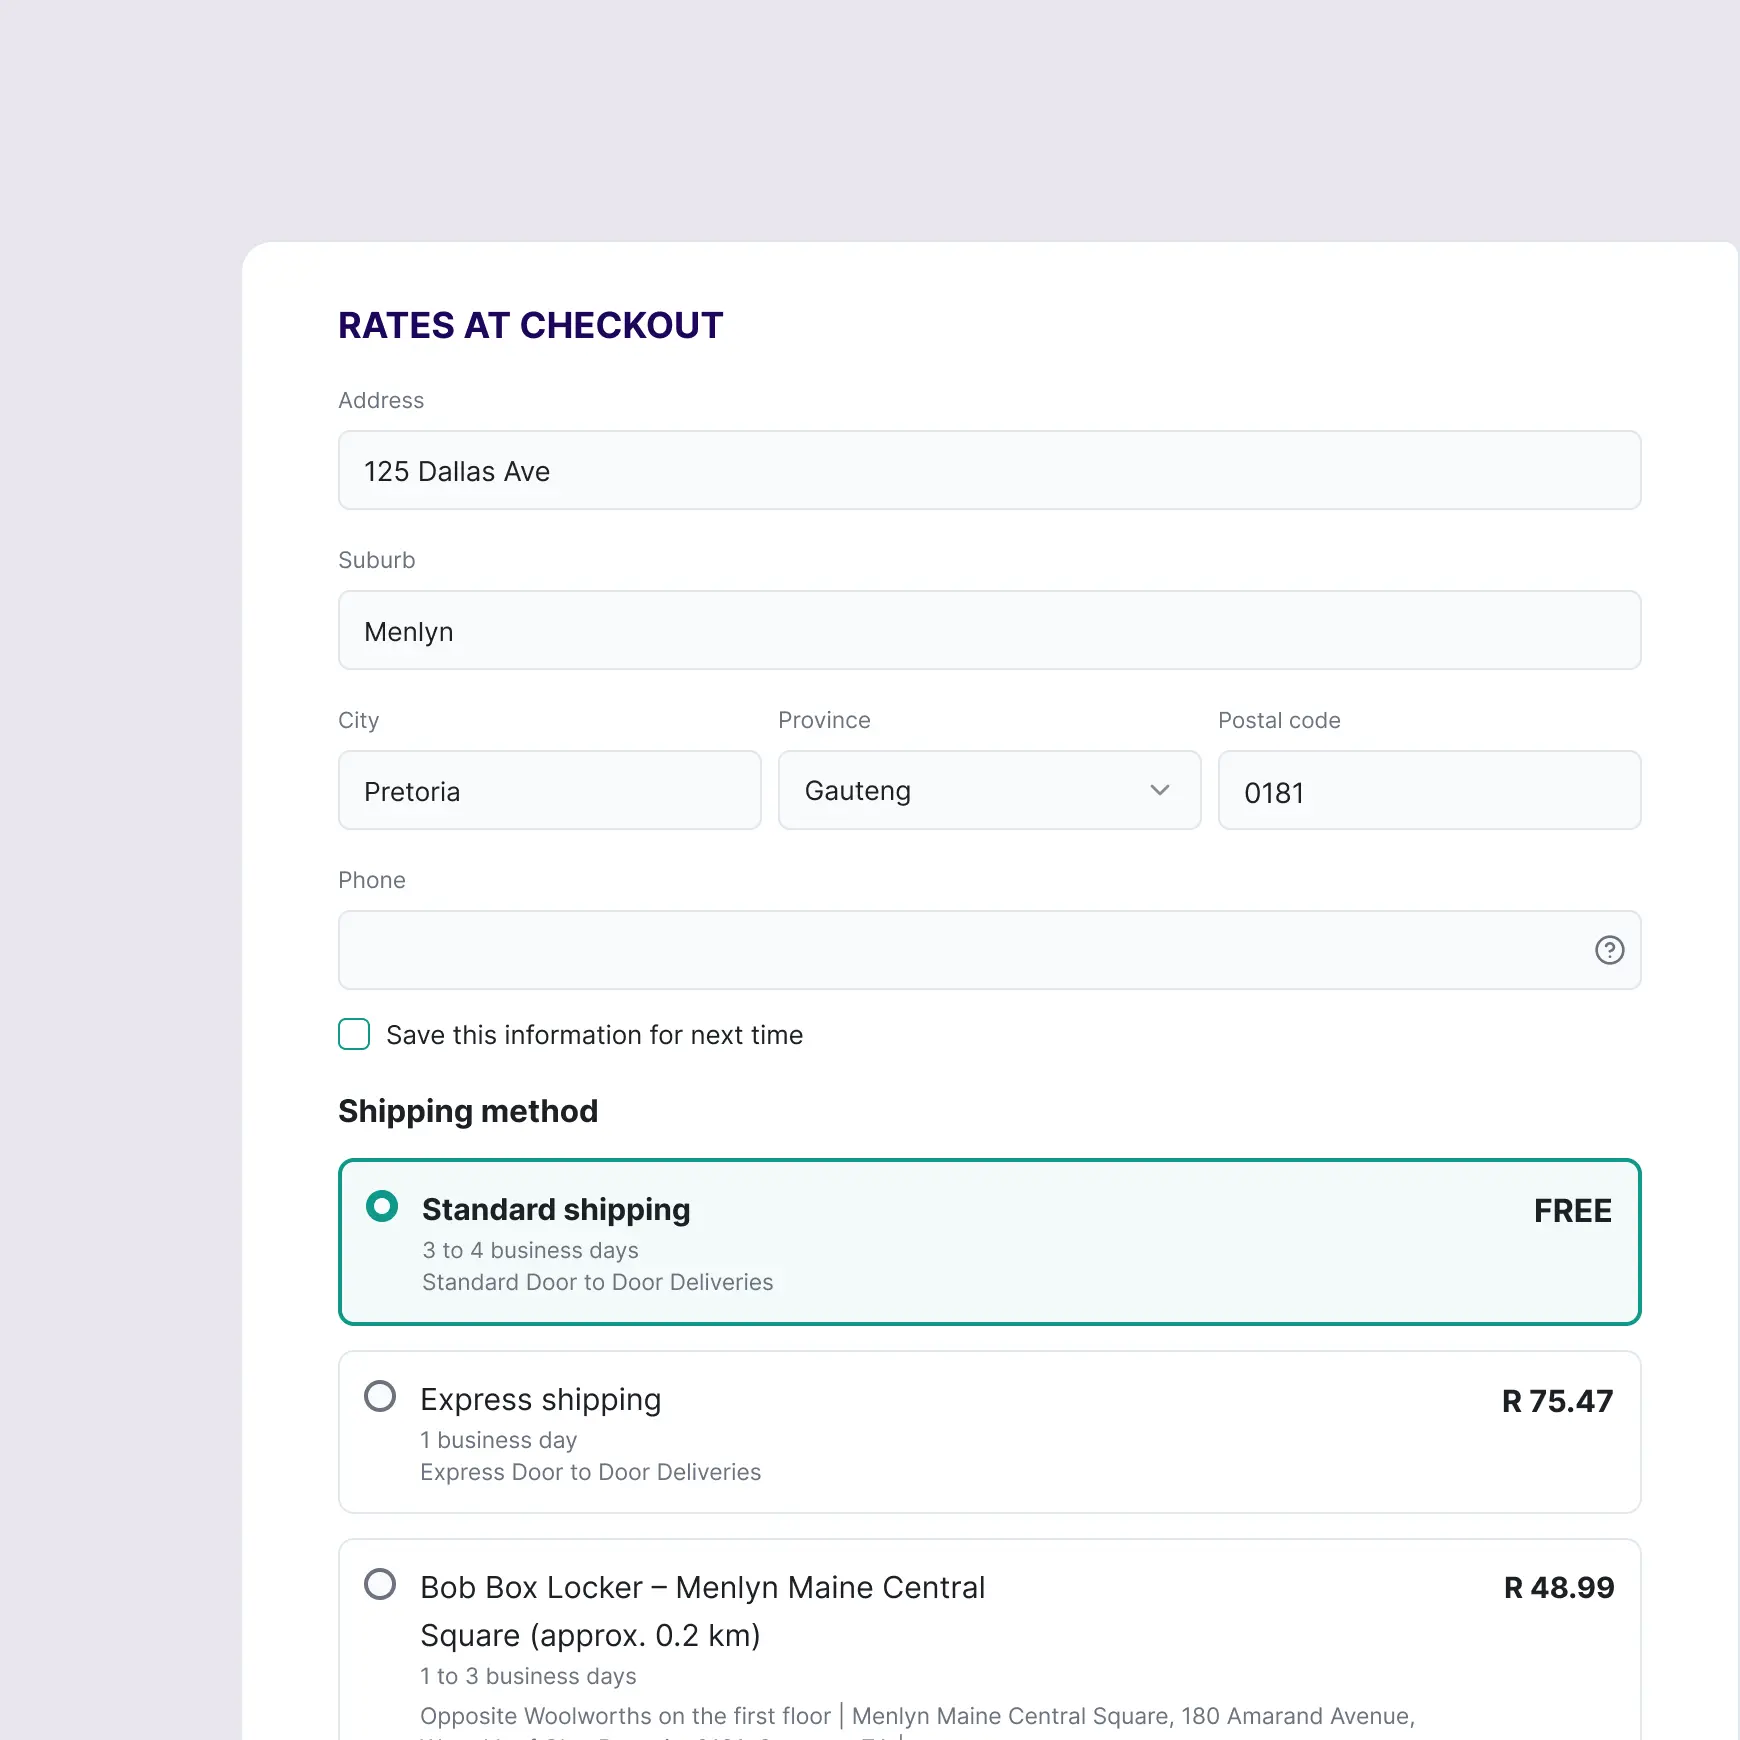
Rates at checkout
Provide customers with real-time shipping costs directly at checkout.
Order management & automation
Keep everything organised from the moment a customer checks out.
Waybills & fulfillment
Generate, pack, and ship with accuracy and speed.
Courier management
Access the best rates and couriers - all in one dashboard.
Tracking & communication
Keep your customers informed and confident at every step.
.avif)
Support & service
Count on help when you need it most.
.avif)
Service levels

Same day
Delivery takes place on the day of collection, so collection must be requested before 11am.

Express
Delivery takes place on the day after collection, so collection is to be requested before 11am.

Economy
Delivery time varies between 48 and 72 hours, chiefly depending on the destination address.

Ready to ship smarter?
Join thousands of South African businesses simplifying their deliveries with Bob Go.
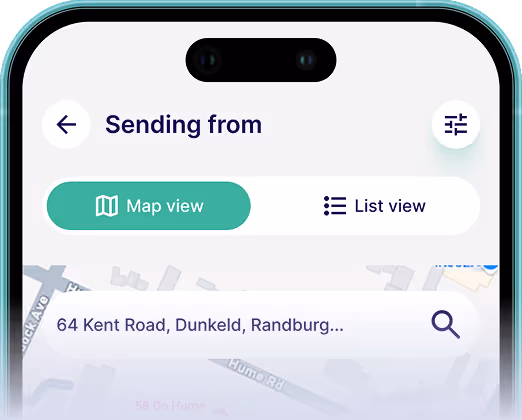
Download our app to ship your parcel
No queues, no stress. Just seamless shipping - right from your phone.

