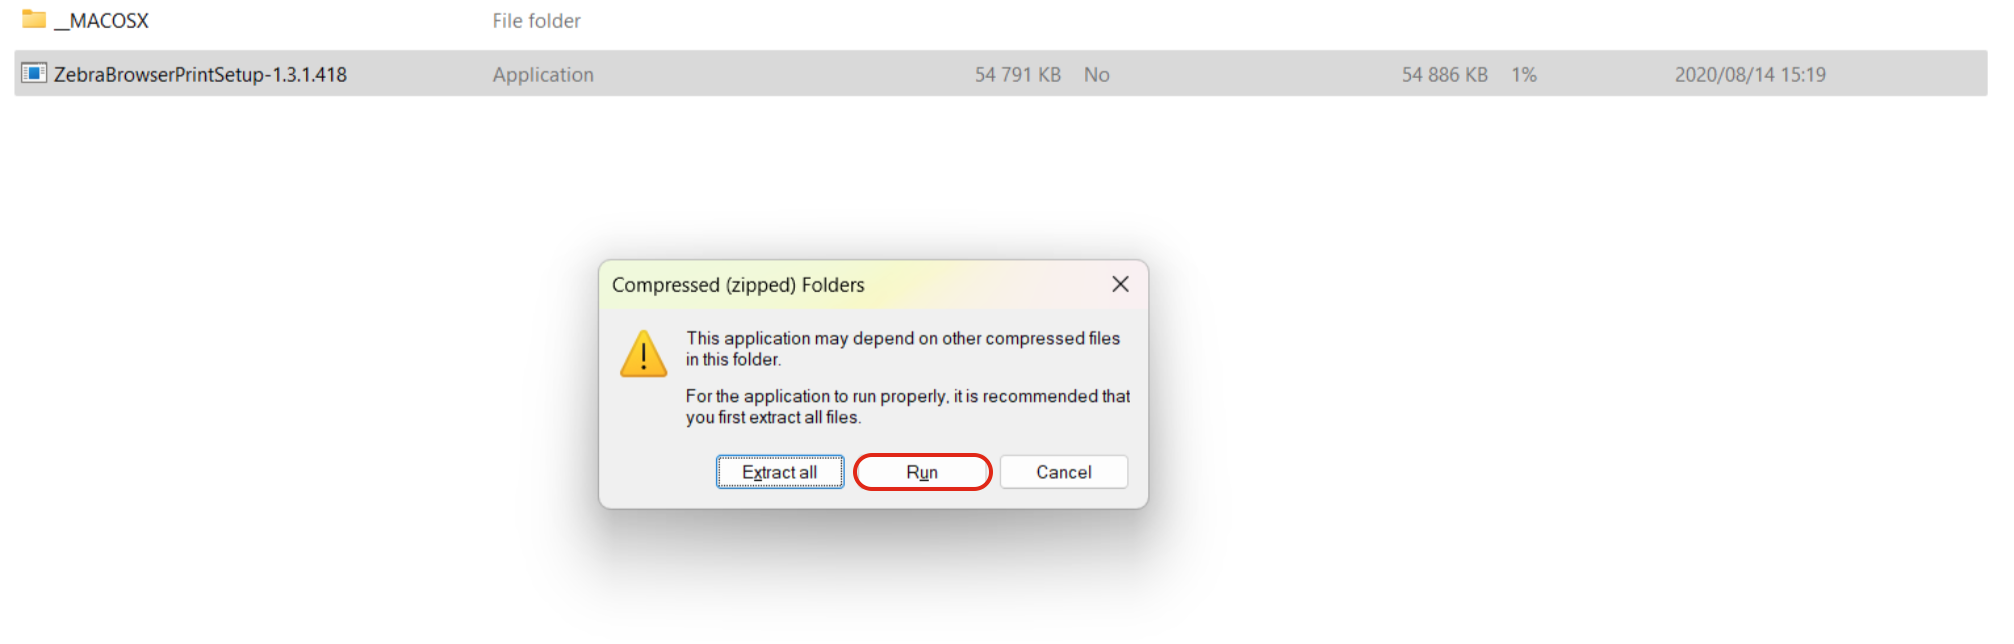
Once the Zebra Browser Print is downloaded, navigate to the applicable folder and open Browser Print. Click to Run and finish the installation by following the prompts.
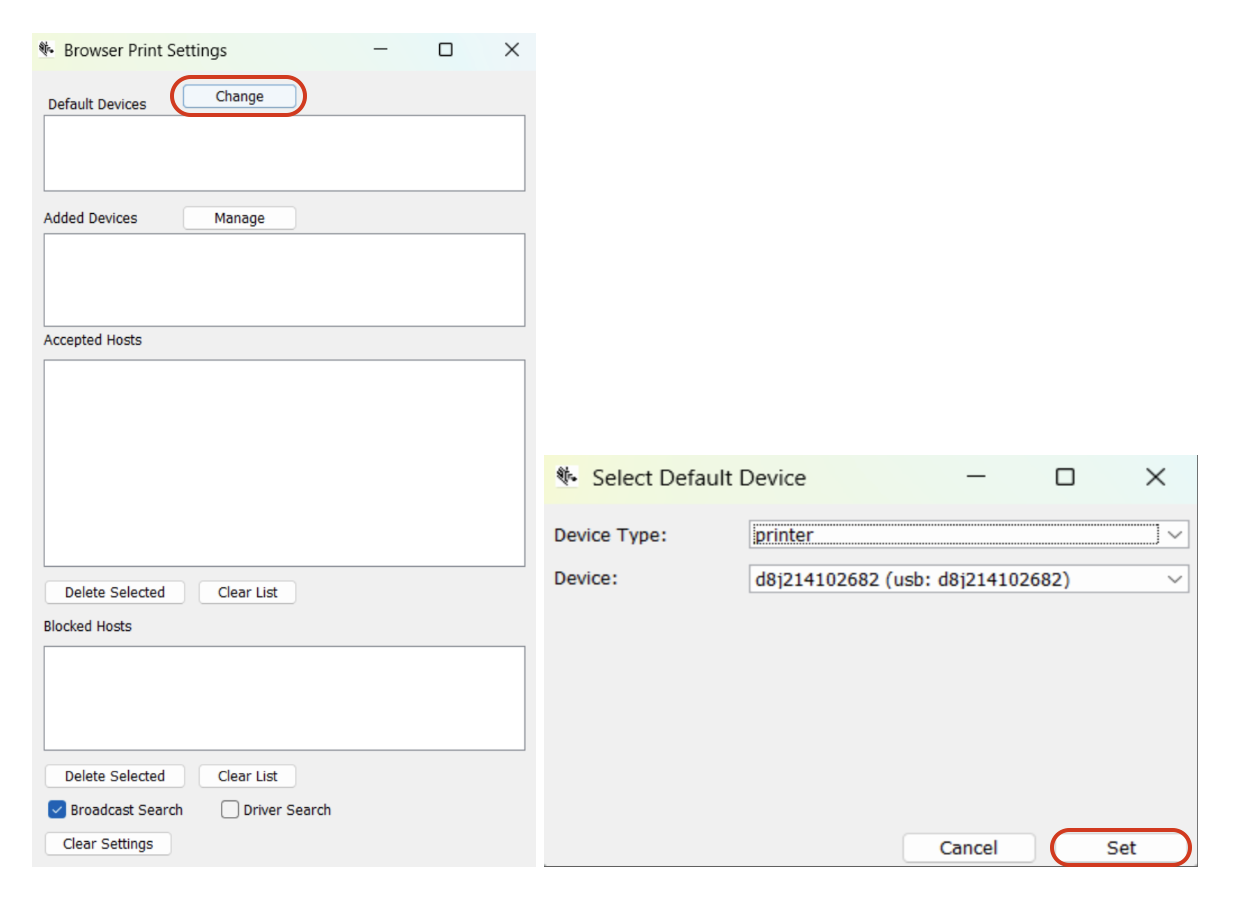
Open Zebra Browser Print, navigate to "Change" and selected the printer from the drop down menu. Click on "Set" to save. Please ensure your printer stays connected to your computer during this process.
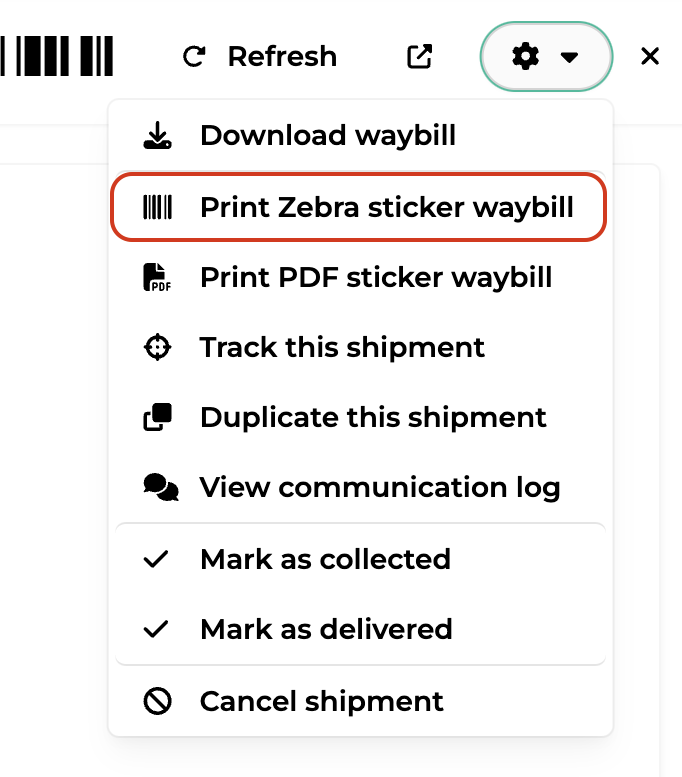
Once the device/printer has been set, log in to your Bob Go account, navigate to shipments and print a Zebra sticker waybill.
You will be asked to allow “https://www.bobgo.co.za” access to the Zebra printer. Click “Yes” to complete the configuration and print your shipping label.
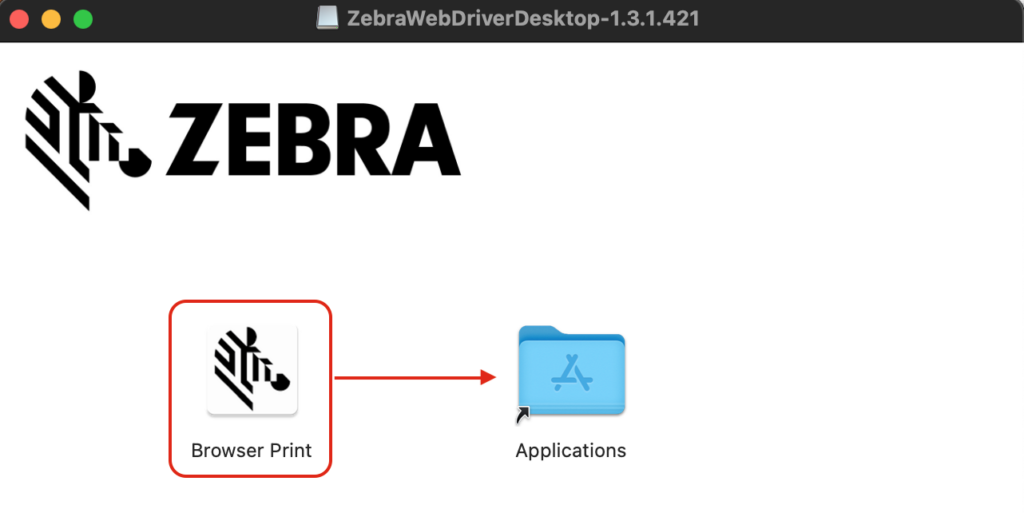
Once downloaded, open Browser Print and drag the Browser Print icon into your applications folder.
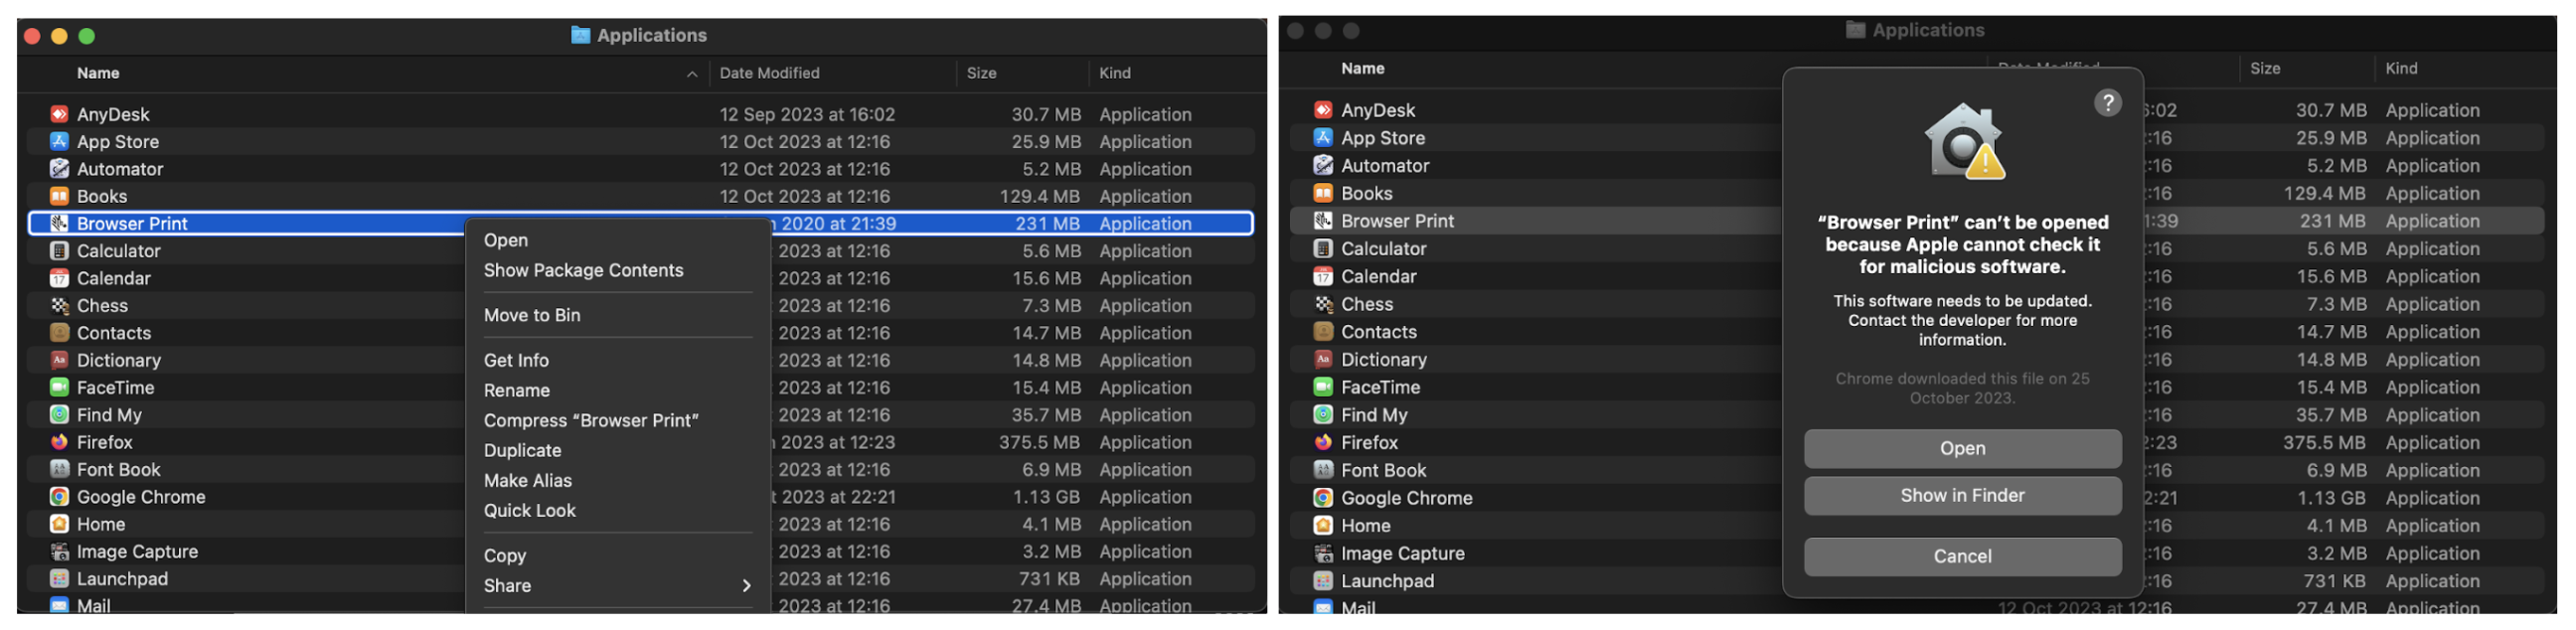
Double-click on applications, and right-click to open Browser Print. It is important to note that you will have to right-click to open Browser Print based on security limitations from macOS.
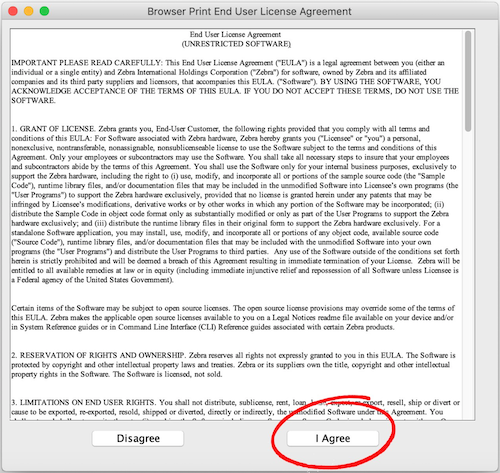
When prompted, accept the “Browser Print End User License Agreement”
Open Zebra Browser Print, navigate to "Change" and selected the printer from the drop down menu. Click on "Set" to save. Please ensure your printer stays connected to your computer during this process.
Once the device/printer has been set, log in to your Bob Go account, navigate to shipments and print a waybill.
You will be asked to allow “https://www.bobgo.co.za” access to the Zebra printer. Click “Yes” to complete the configuration and print your shipping label.
Once the Zebra Browser Print is downloaded, navigate to the applicable folder and open Browser Print. Click to Run and finish the installation by following the prompts.
Open Zebra Browser Print, navigate to "Change" and selected the printer from the drop down menu. Click on "Set" to save. Please ensure your printer stays connected to your computer during this process.
Once the device/printer has been set, log in to your Bob Go account, navigate to shipments and print a waybill.
You will be asked to allow “https://www.bobgo.co.za” access to the Zebra printer. Click “Yes” to complete the configuration and print your shipping label.
Once downloaded, open Browser Print and drag the Browser Print icon into your applications folder.
Double-click on applications, and right-click to open Browser Print. It is important to note that you will have to right-click to open Browser Print based on security limitations from macOS.
When prompted, accept the “Browser Print End User License Agreement”
Open Zebra Browser Print, navigate to "Change" and selected the printer from the drop down menu. Click on "Set" to save. Please ensure your printer stays connected to your computer during this process.
Once the device/printer has been set, log in to your Bob Go account, navigate to shipments and print a waybill.
You will be asked to allow “https://www.bobgo.co.za” access to the Zebra printer. Click “Yes” to complete the configuration and print your shipping label.